
9/29/2012
Can you find M?
We began a new unit this morning which focuses on the letter M. We went around the house looking for things that started with the letter M, and Elie came up with a startling revelation. The bottom of her nose looks like a lowercase 'm'. Nice one!

9/28/2012
Pinterest Challenge #32 - Hot Spinach Salsa Queso Dip

- 3-4 handfuls of fresh spinach (the original recipe called for frozen spinach, but I much prefer fresh)
- 1 lb of Velveeta (I used sharp cheddar)
- 1/2 jar of salsa
- 1 8 oz. pack of cream cheese
- 2 Tablespoons of Tabasco Chipotle (I thought it needed a little flavor)


It was quite tasty. Next time I may add even more Tabasco!
9/26/2012
Salt Writing

In Unit 1 of My Father's World, Elie tried out a new activity that will continue throughout the year. Salt writing.

It was a simple setup. I used a resealable plastic container and put a thick layer of salt inside. She had fun making the letter S (our first unit) and then proceeded to play with it for about 20 minutes, drawing different things in the salt.

Sensory bins are taken out on an almost daily basis, so she knows the rules for keeping all of the box contents inside the box - but with salt, there was a little bit spread out on her table. So she grabbed her dust vac and cleaned up.
9/25/2012
Fruit Flies Go AWAY!

1. Cut up fruit (I used an apple that way on its way out to the trash anyway).
2. Put the fruit in a bowl with about 1/2 cup of apple cider vinegar in the bottom.
3. Cover the bowl tightly with Saran Wrap.
4. Use a toothpick to poke holes for the fruit flies to get into.
Boy did it work. Within a few hours there were probably 10 of them in the bowl, and I just went outside and released them. I brought the bowl back inside and repeated the process for a few days until my house was rid of them. I know as soon as I see one of these pesky bugs in the house again, I will make this trap again.
9/24/2012
Pinterest Challenge #31 - Pumpkin Cake

1 box butter cake mix
4 eggs
1/2 cup of oil
1/2 cup of greek yogurt
1/2 cup of milk
3/4 ounce box of vanilla instant pudding mix
1 can of pumpkin
1 stick of butter
1 teaspoon of cinnamon
3/4 cup of brown sugar
1/4 cup of milk
3/4 of powdered sugar
Now that you see the ingredients, you can understand why I didn't want to make this cake for just our family. That's a lot of stuff in there! Okay, here are the steps:
1. Spray your 9 by 13 pan with cooking spray and preheat the oven to 350 degrees.
2. Use a mixer to beat the cake mix, eggs, oil, yogurt, milk, pudding, and pumpkin until creamy. Spread this in the pan.
3. Melt the butter in a bowl and mix in the brown sugar and cinnamon. Drizzle it over the 'raw' cake and swirl it with a fork or knife.
4. Bake for 30 minutes until cooked.
5. While the cake is baking, mix together the powdered sugar and milk. Once the cake is removed from the oven, drizzle the milk/sugar mixture on top of the cake.
My cake (as you can see by the above picture) came out of the oven looking like a topographical map - complete with lots of mountains and valleys. If I make it again and it comes out looking the same, I will call it the Grand Canyon cake.
We reheated each piece just before we ate it and put a spoonful of Cool Whip on top. Oh my, it was so good!
9/23/2012
Name Change
Our previous blog's title was "The Cupp Family's Journey: Walking by Faith." I've been thinking of changing it for quite some time. Since we are homeschooling, the idea of a homeschool name has been a topic of conversation. At first I liked "Cupp's Christ Centered Academy", but that seemed a little long and I wanted something more original. So I decided on the name:
Cupp of Life Homeschool
9/22/2012
First Day of Autumn and Pinterest Challenge #30

 After seeing this Pinterest Idea from A Diamond in the Stuff, I was quite eager for today (the first day of autumn). A few weeks ago I bought a bunch of frames from the Dollar Tree. I ended up buying 9 altogether because I would like to do them for every season/holiday, and I figured the longest word I would spell would be CHRISTMAS.

And there you have it! Our quick and easy mantle decor.

9/20/2012
Crummy to Classy - The story of my bar stools


I put the fabric on a table and centered the bar stool on it upside down. Then, I just gathered up sections of the fabric and used a air compressed staple gun to adhere the fabric to the underneath of each bar stool.
Easy Peasy!

9/19/2012
Money Sorting


9/17/2012
Pinterest Challenge #29 - Play-doh Number Holder


Elie quickly put them in order and moved onto playing with the play-doh.
9/16/2012
Pinterest Challenge #28 - Popcorn Sensory Tub

I grabbed a bin, threw it all together, and Elie went to town having a good time.

9/13/2012
Creation Book

I just adore that handwriting!

This day was simple. Glue, paper, done!

She painted the water and added cotton balls for clouds.

Elie made grass, trees (with apples), and bushes (with grapes and strawberries).

White crayon on black paper for the stars and moon.
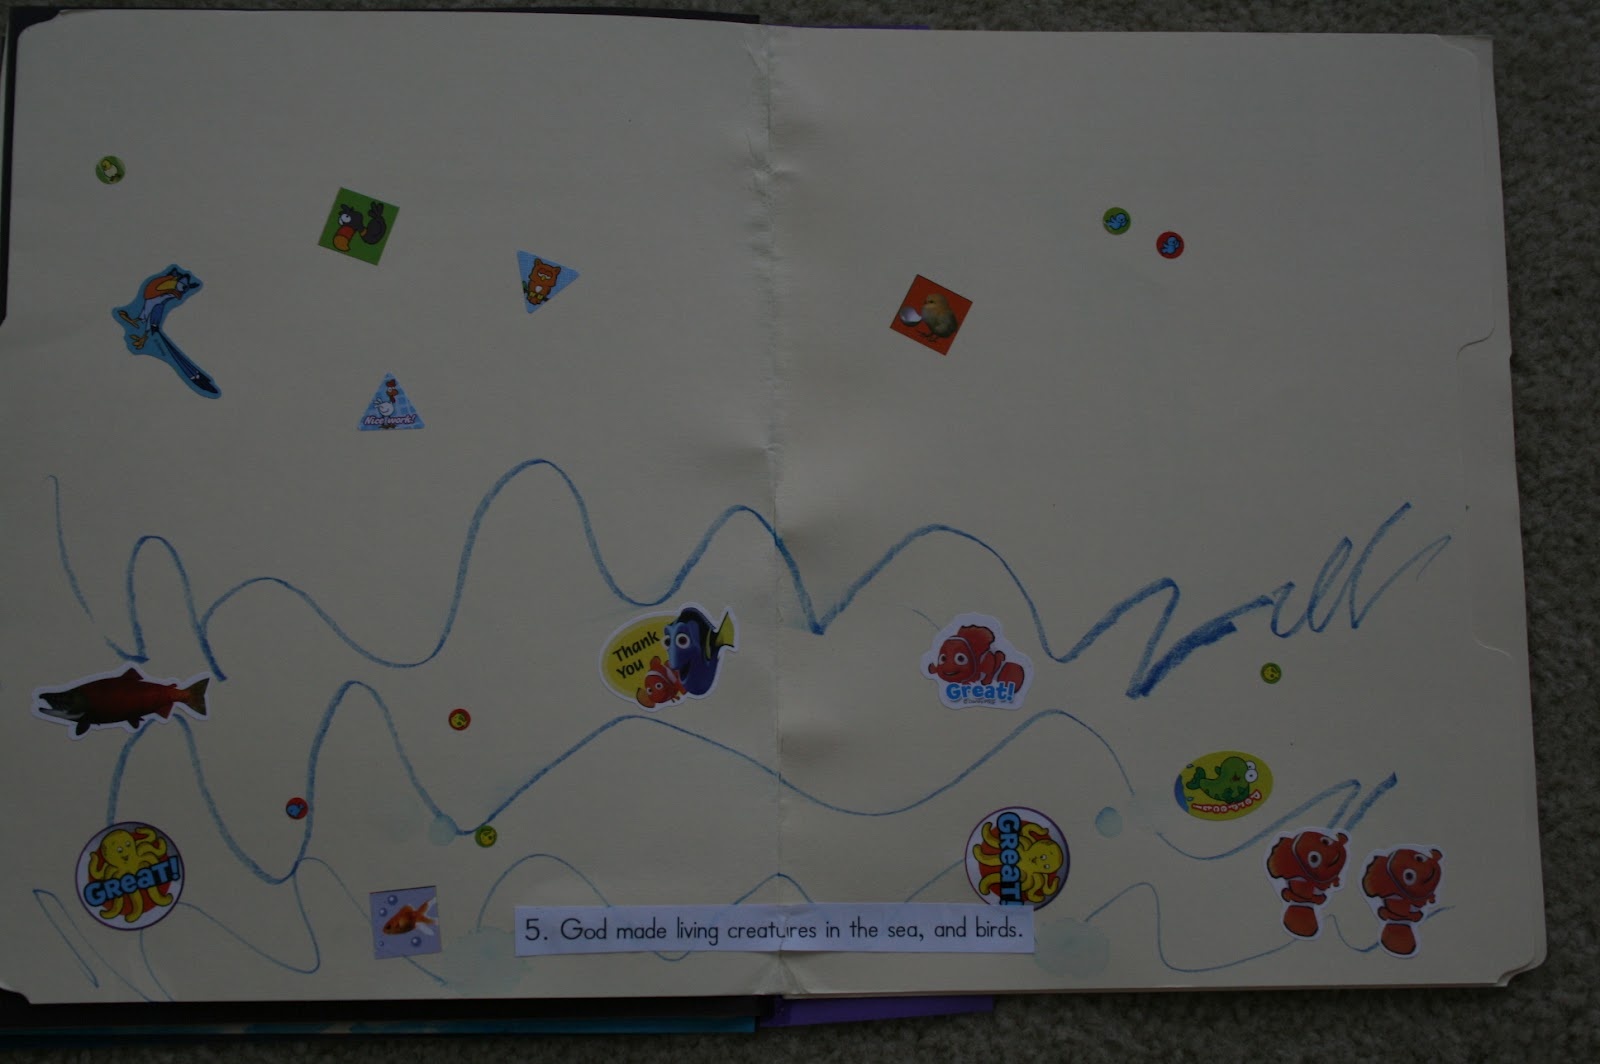
Stickers helped out this day. Not sure how it would look if she had to draw fish and birds.

Here are Elie's man, woman, and animals. Oh through the eyes of a 3 year old.

Easiest day of all!
9/12/2012
Pinterest Challenge #26 & #27 - Homemade Ice Packs

Both of these ice packs sounded great on Pinterest so I decided to perform a little experiment. Here's what I did:
Alcohol Ice Pack - I followed One Good Thing's instructions and mixed 1 part rubbing alcohol and 3 parts water. Pinterest Link
Dawn Ice Pack - I followed Fun, Cheap, or Free's instructions and just put Dawn straight into the bag. Pinterest Link

I stuck them in the freezer and waited a few days to compare. When I removed them from the freezer, both bags were practically frozen SOLID - not the mushy ice pack they both read to be. So I came up with another solution that involved more Alcohol.
I removed both ice packs and let them thaw. I then took another bottle of rubbing alcohol and mixed half of the bottle into each bag, and then I refroze. This time, I was impressed. The packs are both much more mold-able than the first time. I hope to soon sew little patches for them to fit into.
9/11/2012
Pinterest Challenge #25 - Creme Brulee

- 6 egg yolks
- 6 Tablespoons of white sugar
- 1 1/2 cups of heavy whipping cream
- 4 Tablespoons of brown sugar
- A little butter to grease the ramekins

WARNING: It really is a simple recipe, but it takes time. You can't just throw it together last minute. Give yourself at least 3-5 hours for it to be fully done.
- Whisk the yolks in a mixer for a couple of minutes.
- Add the white sugar and keep whisking.
- Add the cream and keep whisking (I think I'm seeing a pattern here).
- Butter six ramekins and place them into a pan. Fill the pan with warm water until the water goes halfway up the ramekins.
- Bake at 275 degrees uncovered for about 45 - 50 minutes.
- Remove pan from oven and allow the entire pan to cool (do not take the ramekins out of the water).
- Once they are at room temperature, chill them in the fridge for a couple of hours.
- Adjust your oven rack to be rather close to the broiler (about 3-5 inches)
- sprinkle a little bit of brown sugar on the top of each Creme Brulee
- Set in a baking pan and closely watch them broil. The tops should be brittle, yet not burnt.
- Remove and enjoy. You can chill it after broiling, but we just dug right in and enjoyed!

Original Recipe
9/10/2012
Pinterest Challenge #24 - Apple Pie Salsa with Cinnamon Sugar Tortillas

We recently attended an apple play date, so I was eager to try out this recipe. I took the above picture before I began cooking. The original recipe called for corn starch, but I ended up not needing to use it. A few moms asked for the recipe, so here it is:
- 4 apples peeled, cored, and diced
- 3 Tablespoons of brown sugar
- 1/2 teaspoon of cinnamon
- 2 Tablespoons of lemon juice
- however many tortilla you want (I only used two burrito sized ones)
- butter (to your liking)
- cinnamon and sugar for sprinkling on tortillas

Combine the apples, brown sugar, cinnamon, and lemon juice into a pan and cook over medium-heat. I cooked it for about 12-15 minutes. I wanted my apples to not be too crisp, more of a cooked taste. While that was cooking, I spread a little butter on my tortillas, added cinnamon and sugar, and cup them up into triangles. Then I placed them in a 415 degree oven for 5-6 minutes until brown.

Voila! I served it warm, but it did taste good cold later on. Either way, it is up to you!
9/09/2012
Pinterest Challenge #23 - Chess Squares
Years ago at a scrapbooking convention in Natchez, my mom and I discovered these wonderful creations known as chess squares. Oh, they are so good. My mom made them last year at Christmas-time, and they were delicious. A few nights ago, I had a little time to throw together a quick dessert for a Bible study we were attending that night. It was a huge hit, and I was glad none came back home because I didn't want the temptation lurking in the house! So, here's what you need to make it:
 1 stick of melted salted butter
1 box of yellow cake mix
8 ounces of softened cream cheese (I used fat free - I had to make up for the butter somehow)
3 eggs
3 cups of powdered sugar
 First, mix cake mix, melted butter, and one egg to form a soft dough. Press this dough into the bottom of a 9x13 sprayed pan.
 Mix powdered sugar, two eggs, and softened cream cheese for about 2 minutes. Pour on top of pressed dough.
 Bake at 300 degrees for 45 minutes until the top is golden brown. ENJOY! It is so good!
Pinterest Link
Original Recipe

1 box of yellow cake mix
8 ounces of softened cream cheese (I used fat free - I had to make up for the butter somehow)
3 eggs
3 cups of powdered sugar


Original Recipe
9/08/2012
Pinterest Challenge #22 - Pumpkin Cheesecake Trifles

- 6 Biscoff Cookies crumbled
- 1 tablespoon melted unsalted butter
- 8 ounces of cream cheese (softened)
- 3/4 cup of pumpkin
- 1/4 cup of powdered sugar
- 2 teaspoons of cinnamon
- two cups of whipped cream (I used homemade)
- caramel sauce
- Combine cookie crumbs and butter then place at the bottom of your glasses.
- With a mixer, beat cream cheese until smooth.
- Add cinnamon, pumpkin, and powdered sugar and beat until combined.
- Fold in 3/4 cup of your whipped cream.
- Layer pumpkin cheesecake on top of crust, then follow with whipped cream, another layer of pumpkin cheesecake, and another layer of whipped cream.
- I drizzled the top with caramel sauce, and put them in the fridge for about 45 minutes so they were chilled.

Delicious recipe, but they were not nearly as pretty as the picture. I could have been neater with the layers, but we were in a rush. Oh well, they were still eaten without a problem! I will make them again this year for sure!
Pinterest Link
Original Recipe
9/07/2012
Pinterest Challenge #21 - Invisible words


Super easy idea and lots of fun!
Pinterest Link
Original Instructions
Subscribe to:
Posts (Atom)